Africa Travel Overview – Tips and Tricks
Navigation to Detailed Trip Reports and Photo Galleries:
Google Map: Interactive Trip Map of Zimbabwe and Botswana
Africa Gear Set-up: Photo and Travel gear for 3 weeks on African Safari for 2 people
Restrictions on our trip: Small aircraft requires each passenger with 1 bag weighing less than 15 kilograms (33 LBS) and 1 carry-on less than 5 kilograms (11 LBS) per person.
Bags Packed:
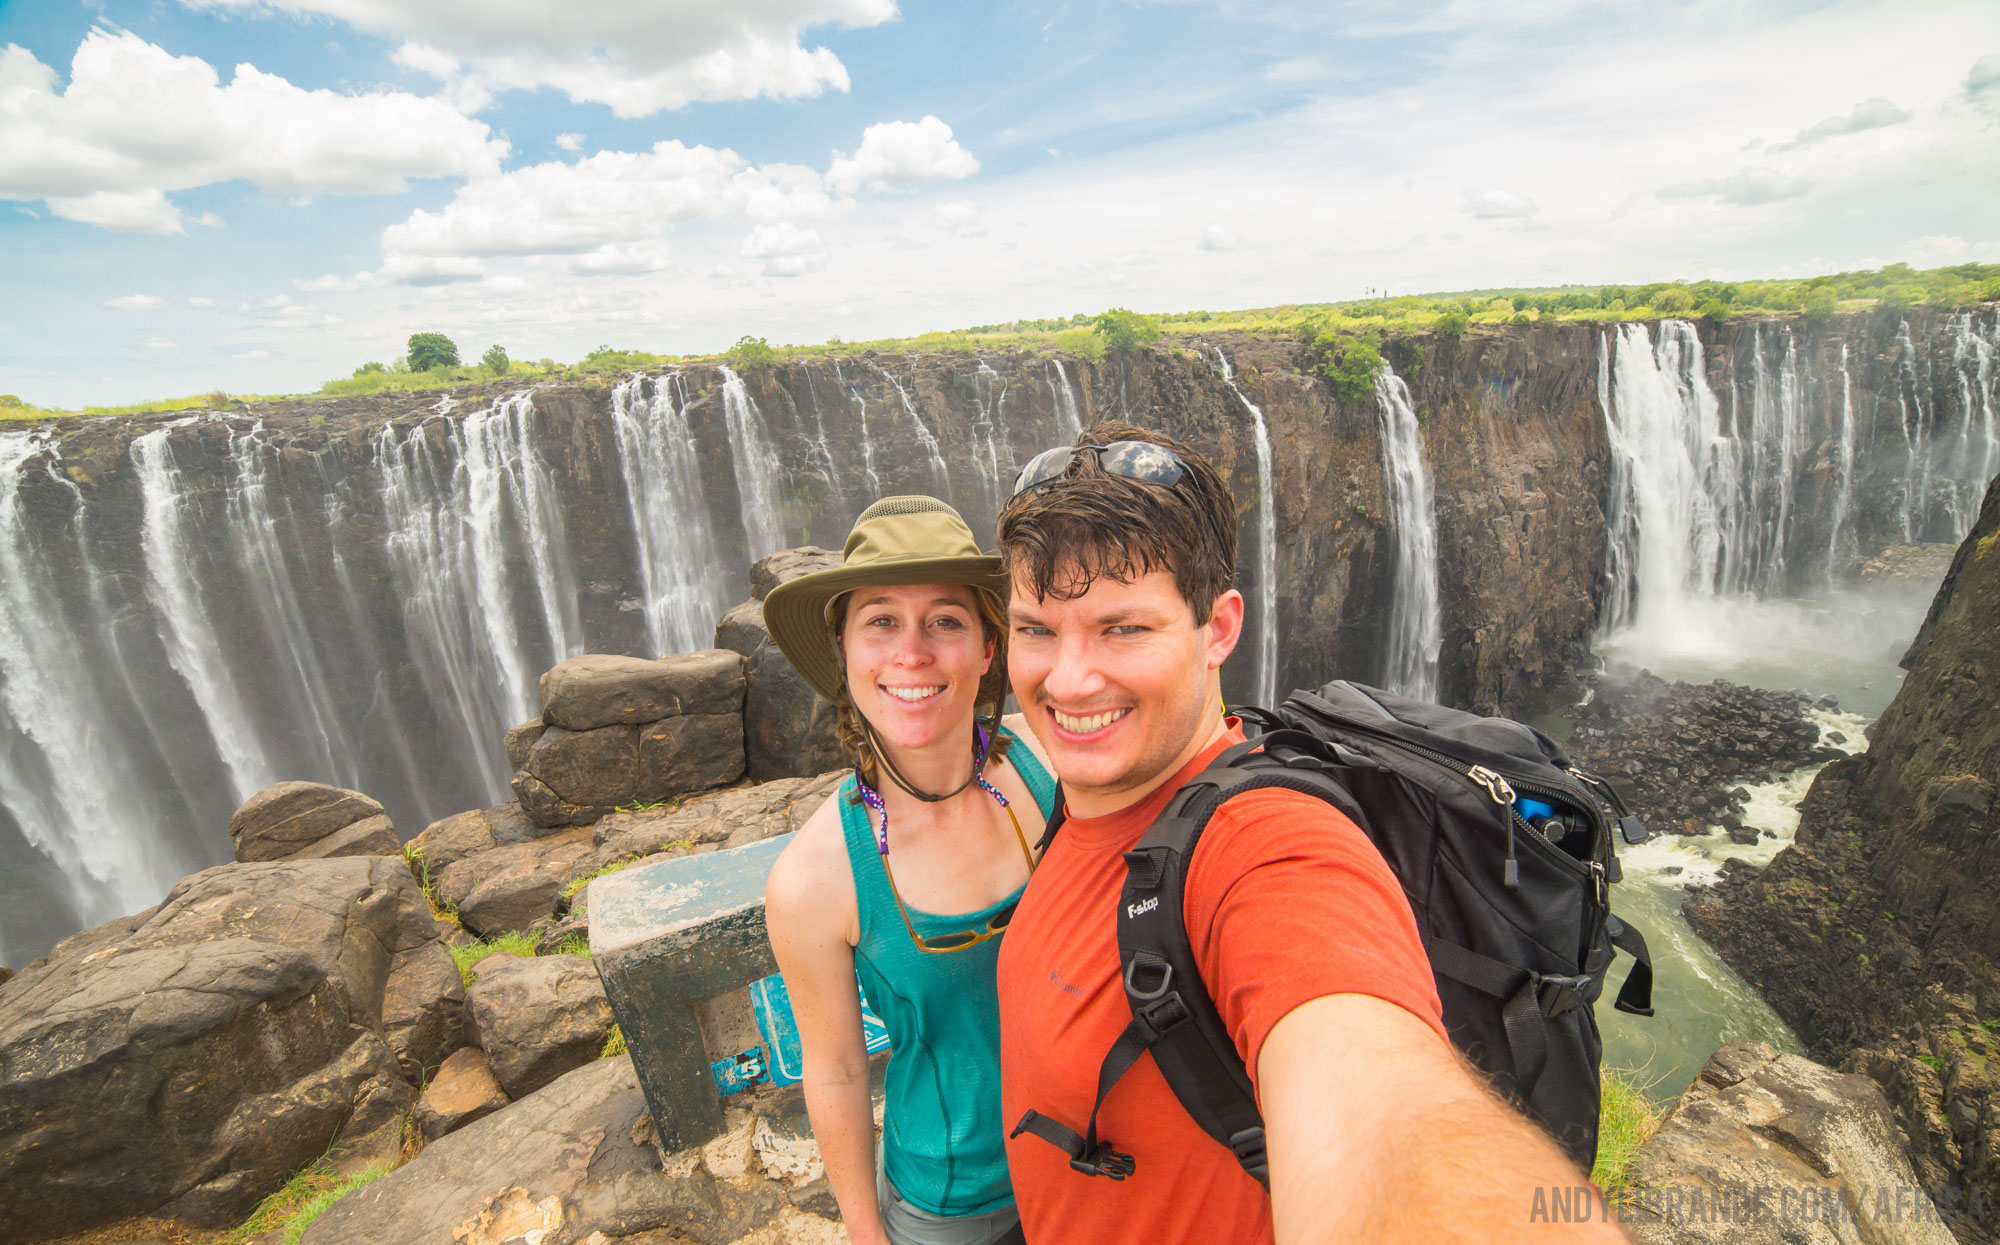
Andy = f-stop photo gear backpack: Tilopa BC with the Pro ICU Slope.
- Carrying all important photo gear.
- Camera cube comes out of camera. Useful for small airplanes (can bring camera on board and leave big pack underneath plane), alternatively you can use the cube as a carryon and fill the main pack with extra stuff if needed.
Caitlin = Kelty Backpacking backpack (checked luggage on airlines) containing all clothing and extras.
+ Small Osprey backpack for carry-on for airplanes.
They weighed us on the first plane we hopped onto at Kasane airport. My photo bag alone was almost over the limit!
Photo Gear:
f-stop photo gear backpack: Tilopa BC with the Pro ICU Slope
- Purchased March 2013 (3 years of heavy use!) and this thing is still in great shape. These are premiere photography backpacks and the best travel pack you could hope for. All photo gear listed below went into my F-Stop backpack.
Photo cube: Pro Slope Internal Camera Unit:
- D750 + D610 Bodies
- Sigma 150-600mm (mounted to d750 for entire trip)
- Nikon 50mm f/1.8
- Rokinon 14mm f/2.8
- SB800x2
- polarizer filter for 150-600mm and for 50mm, + ND for 50mm + singh ray
- 4 Nikon batteries
- Benro MeFoto Travel Tripod (blue) – have beat this thing up for the past 3 years of ownership
- Gopro hero 4 (borrowed! thank you!) + 4 batteries + charger (also brought my Hero2 for Rafting)
- GroPro mounts – (Pole Mount goes nicely to my monopod leg that detaches from my tripod)
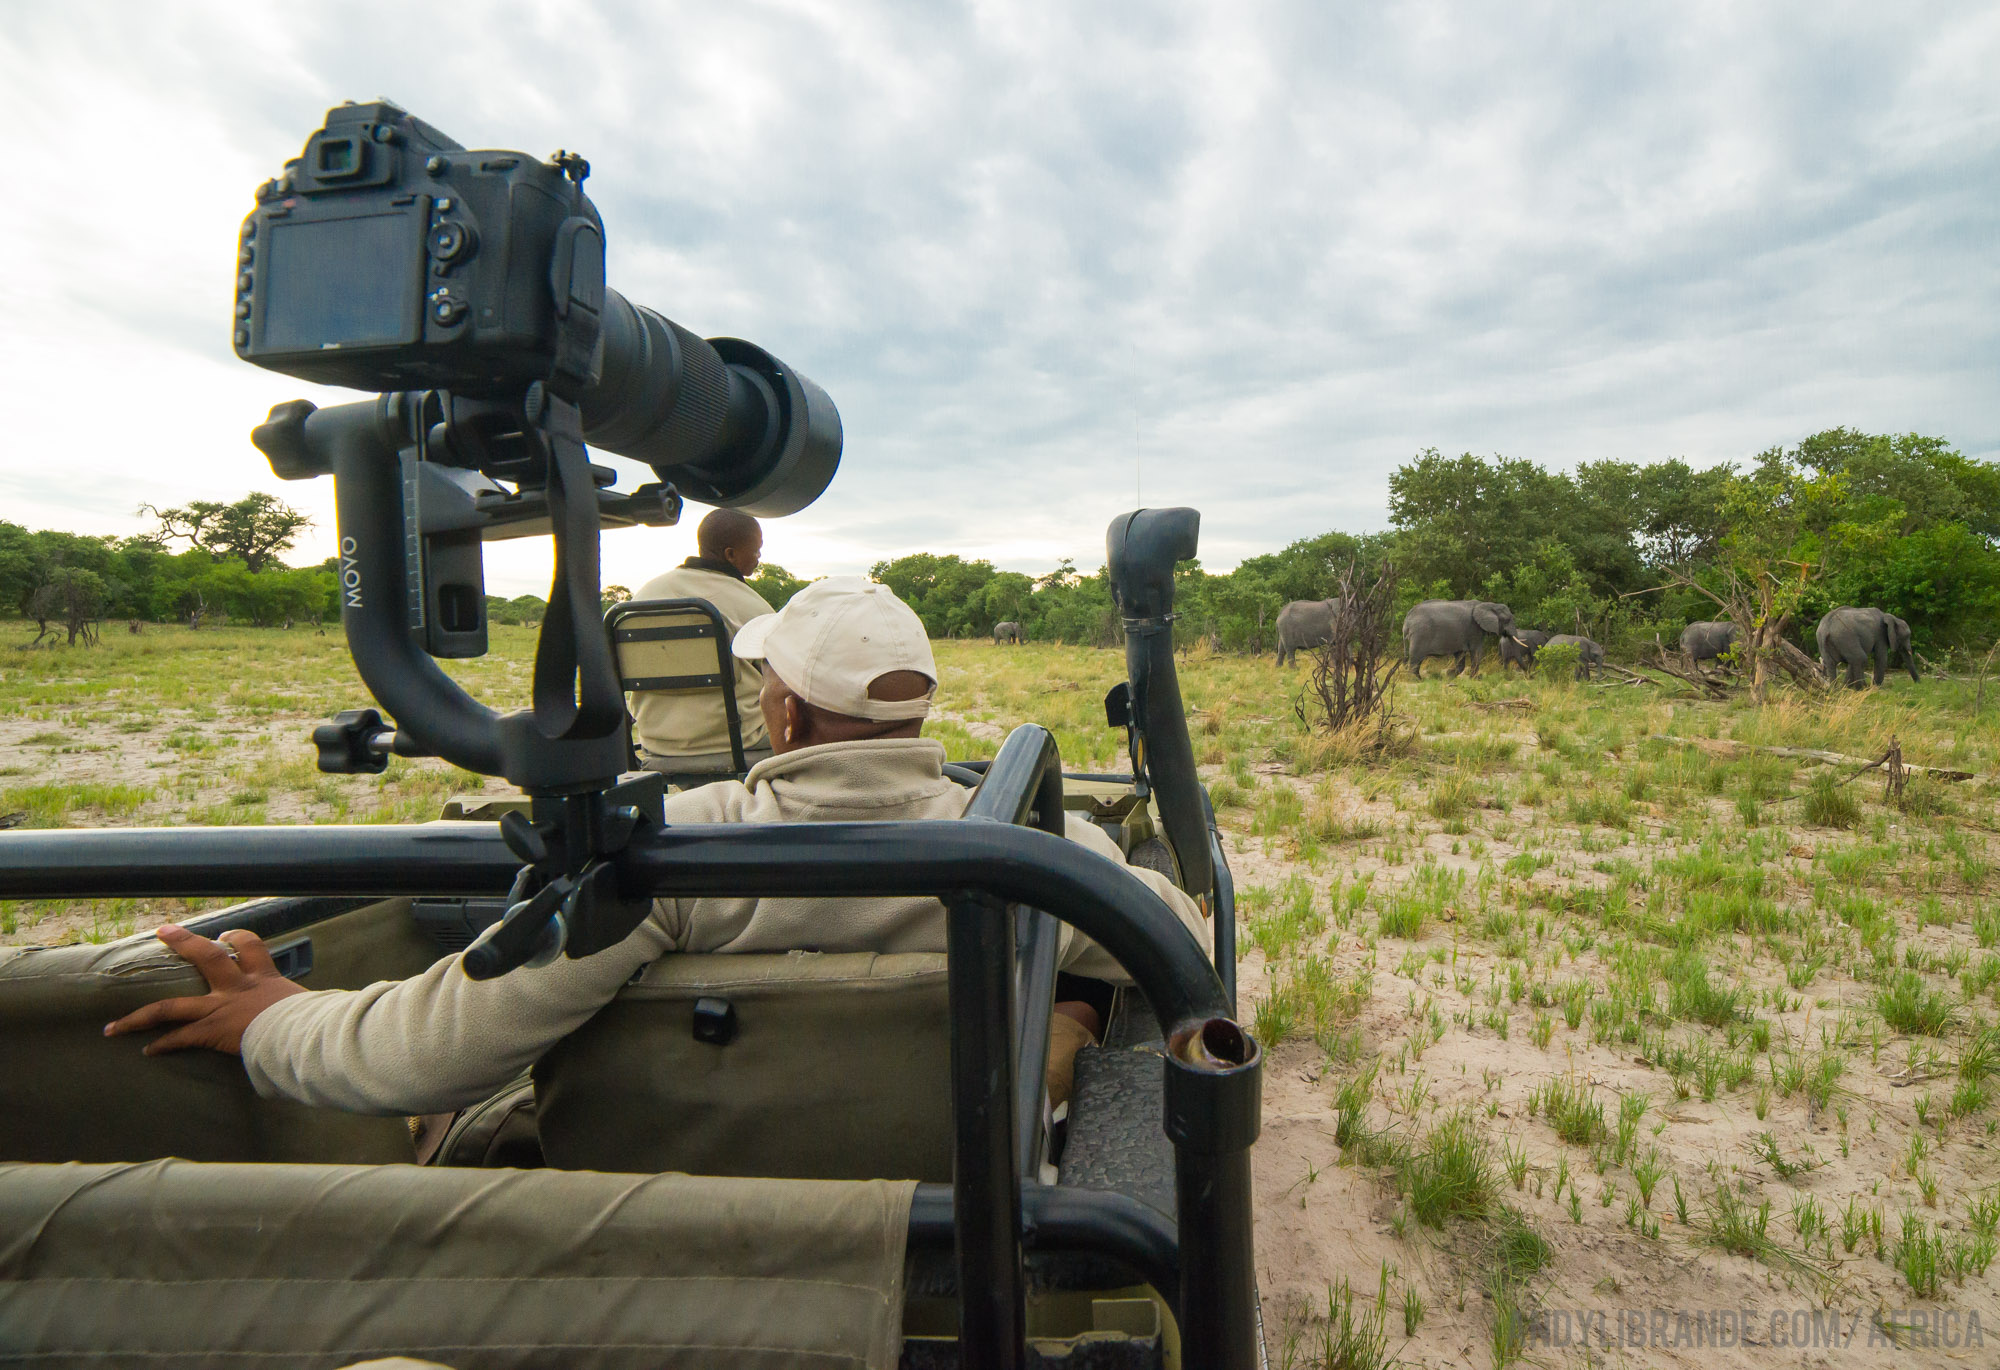
- Movo GH700 Professional Gimbal Tripod Head – having this is a must for photography on safari. A huge lens is a pain to hold if you are situated at a sighting where the animals are chilling. Having it pointed in the right direction so I can pull my eyes off the camera and watch the full scene was critical.
- Peak Design Capture Camera Clip x2 = these attached to the Molle system on the hipbelt of the F-Stop bag is one of the best inventions ever. Changed my travel/hiking/walking photography completely. Not really used while in the Safari vehicles, but when we road elephants at Victoria falls it allowed me to have my camera mounted to my waist so I could have two free hands to switch to the gopro.
- MEMORY CARDS: 2x 128GB cards, 6x 32GB cards. Gepo Extreme Waterproof card holder (holds 4 cards in slots but due to space more cards can fit). One of my 128GB cards failed and luckily I had 100% backups onto 32GB cards. This made things tight and I was right at limits at the end with no backups happening. Spend the money to have plenty of space if you are going to be gone for 3 weeks and have a heavy trigger finger.
Travel Gear for 3 weeks in Africa for 2 people:
- Clothing: Weather ranged from brutal hot to hypothermic cold (one occasion).
- Green/grey/tan colored
- Zip off pants for both of us (Andy = Kuhl and Caitlin = North Face)
- 1-2 pairs of shorts each
- 3-4 shirts each (Andy preferred button up for extra cooling action)
- Long sleeve button up shirts for each of us (Andy and Caitlin = exofficio shirts, Caitlin’s had bugsaway built into it)
- Swimsuits
- 1 warm mid-layer top each
- That’s it, you don’t need much clothing as the camps will do laundry for you usually with same-day service. It was the summer too so it was warm the vast majority of the time.
- Wide-brimmed hat for both of us – necessary for long hot days to keep sun off of you
- Binoculars
- Rain-jacket and rain pants for each of us
- When in the CKGR, Unlimited Safaris had also provided thick rain ponchos that are lined with fleece. Very warm and necessary when we got hit with freezing cold temps during a massive rainstorm.
- Chaco sandals for each of us
- Pair of light hiking shoes for each of us
- Bug Spray – 100% deet and Picardin lotion (luckily didn’t really need while there just on the occasion)
- 3 pairs of sunglasses – one backup pair which we needed as I broke my pair on the 2nd day in Africa…
- 2 books and a kindle
TIPS for African Safari Gear:
#1: Get the gear for the style of vehicle you will be in
In Kwando Camps the trucks were amazing open-air vehicles. Having a gimbal with mount was key. The tripod was useless in these trucks, but I have heard of other trucks where they work.
#2: If possible two bodies makes all the difference. 150mm+ is necessary. 300mm+ will make you happy.
You never know when that lion that was 100ft from you decides to quickly waltz to <15 ft from you. Switching from a giant zoom lens to a mid-range in that time is impossible. If you only have one body be prepared to make decisions and don’t lose a great shot opportunity 5 secs after the lion passes you because you were switching lens to grab an ‘ok’ shot opportunity.
#3: Always be ready – Camera should never leave your side
One of the most amazing shots was when a Leopard walked across the road in front of us. I had 15 secs to react and almost didn’t get any shots as I had the camera tucked down due to the long travel with no other animals in sight. Luckily I got the shot. However the first view we had will only be imprinted in my memory and it was beautiful.
Make sure at all times a zoom lens is mounted to your camera and it is within reach and the settings are ready to go. Animals happen fast.
#4: Don’t hesitate, always capture the photo then work the scene. Many of the best animal behaviors are right as you pull up to them.
Animals move quick, get the shot as soon as possible, then take your time to set-up. Many of my best shots though were within the first few seconds of spotting the animal. The longer you hang out the more likely the animal gets sick of you and disappears into the bush or decides to walk away leaving you with butt shots.
#5: Animals are incredibly hard to photograph.
Getting the right behavior out of an animal is tough. Many are shy. It is hard to shoot humans right when you can give them directions on posture, etc. A lot of animal shooting is taking a lot of photos and getting a great one every once in a while. If you have never shot wildlife before spend a lot of time at a zoo before coming to Africa.
#6: Get Low, or Have the Vehicle be at a distance:
If you are shooting from a Truck you are often pointing the camera down at the animals instead of ‘at’ the animals. This may look great on the back of your camera, but once you print the photo or see it large you will not like the ‘downward’ facing shots as much. Try to crouch down in vehicles or ask the guide to position for best height on an animal sighting.
#7: Shoot everything. Birds, plants, trees, etc:
You are likely on a once in a lifetime trip. Make sure you have a story to bring home and memories of the landscape.
#8: No rush:
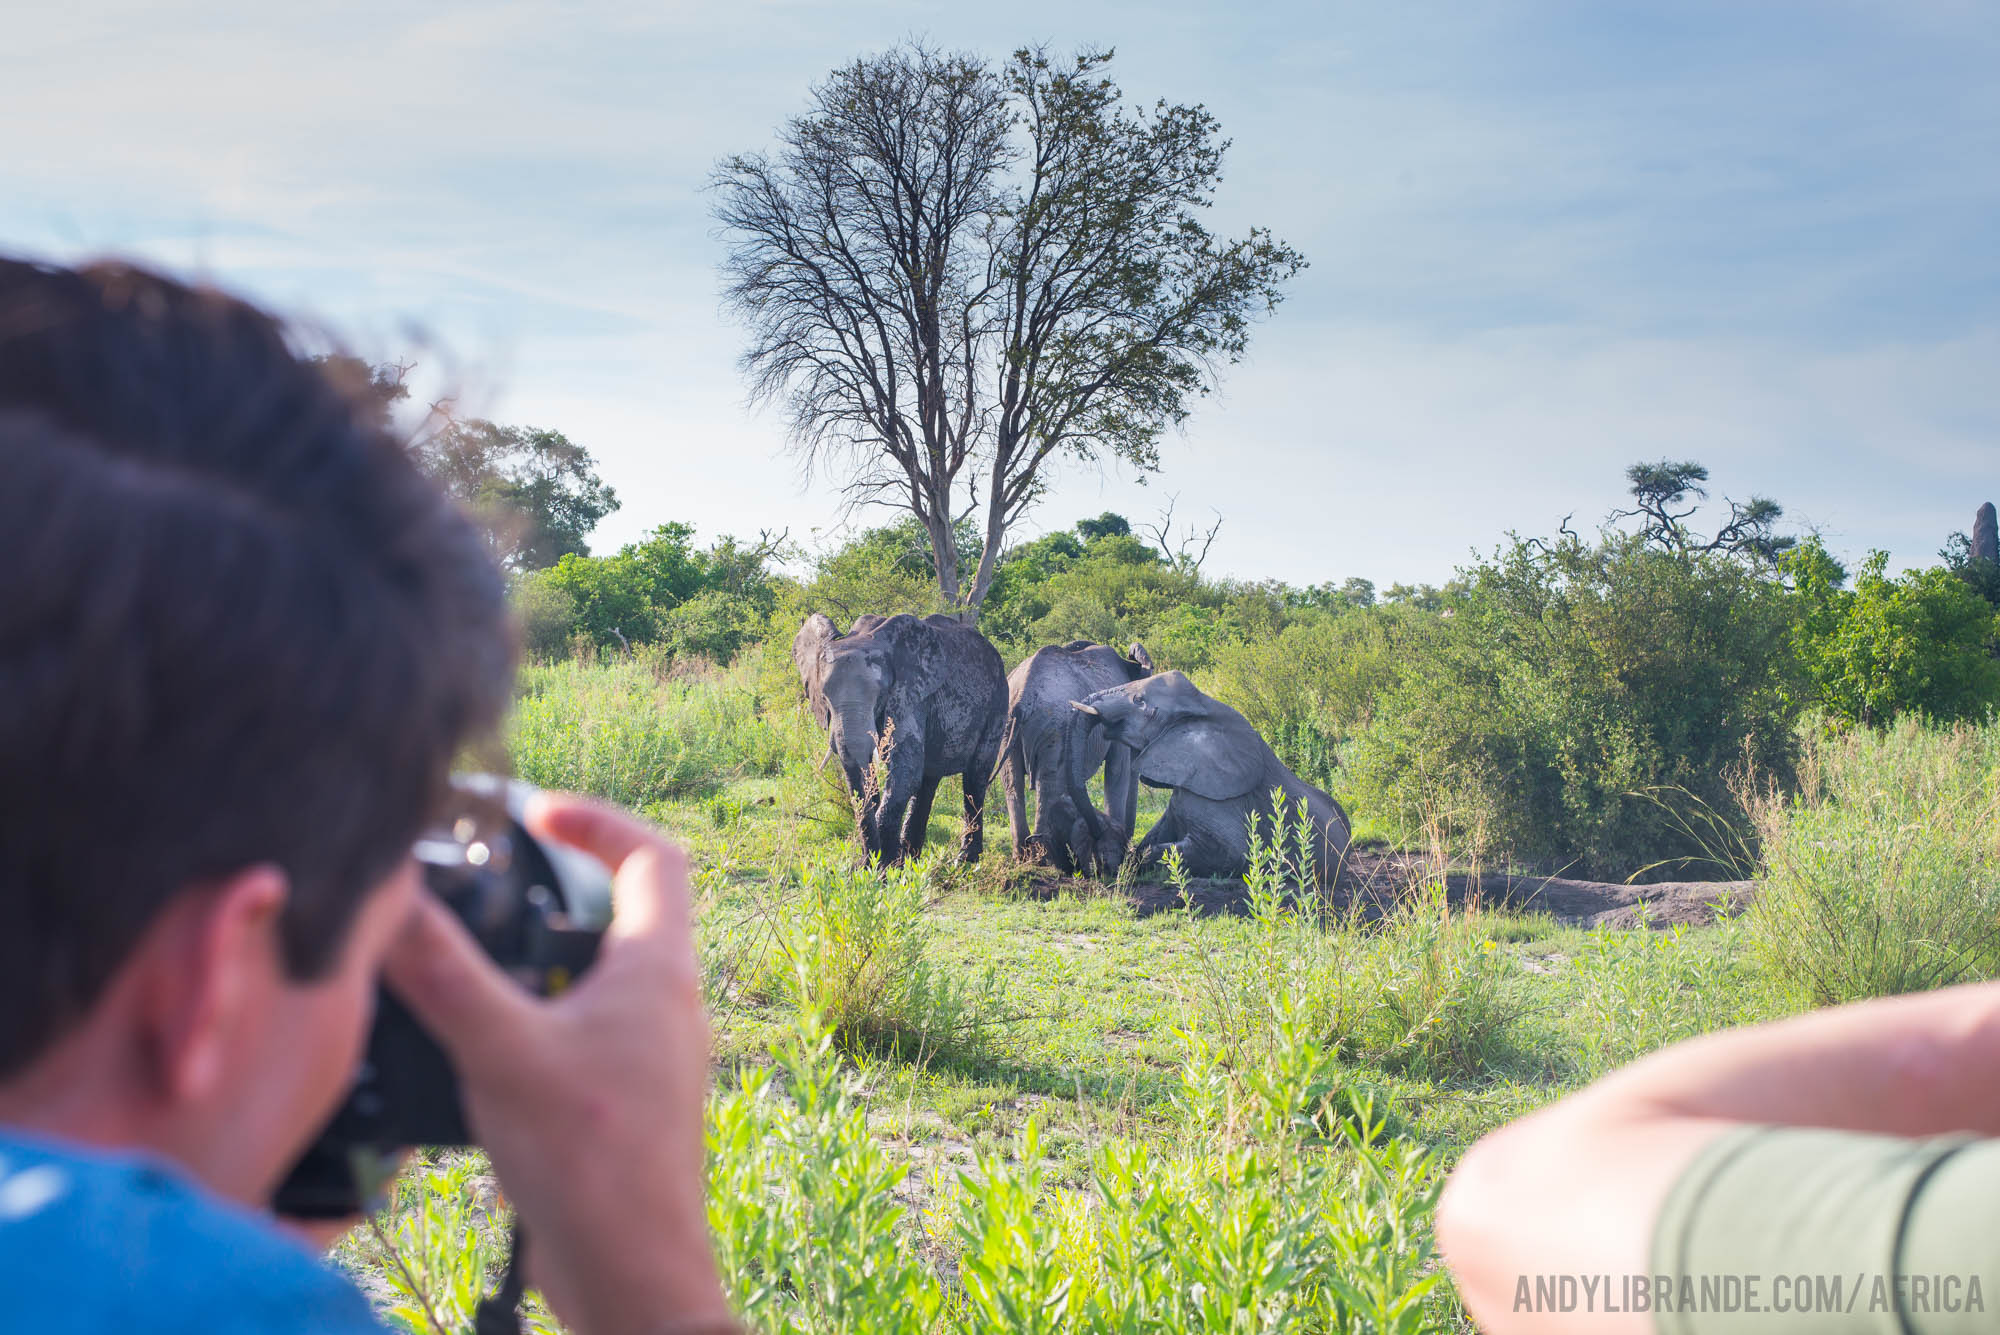
You find some cool animals make sure to hang out with them. Let them get used to you. Then they start playing again and doing interesting behaviors. Our first major encounter was a sleeping cheetah, our guides asked us several times if we wanted to move-on and I was like ‘nah this is good enough, wasn’t expecting cheetahs..”, a few mins later it gets comfortable and begins hunting; leading to one of the most memorable experiences on the trip. If you have others in the vehicle with you make sure they are like-minded and not easily distracted tourists. Another great encounter was seeing these baby lions, the other vehicle was there for 2-4 mins before leaving the sleepy guys behind, we stayed with them for nearly 2 hours (long after the other truck drove off) resulting in the cubs playing heavily with each other and mom, the males waking up and attempting to mate with the other females, and allowed our driver to constantly put us in great photo locations.
Every great extended encounter came about because we spent time with the animals until they started acting normal.
#9: Make sure you are in some photos.
Many of the guides are actually good at photos. Get out of the vehicle and have them take shots of you and your Significant Other or Travel Partners. You won’t regret it and it is really easy to go a whole trip being the photographer and not have any photos of you.
#10: Editing and Organizing Photos when you get home is crucial:
I took 7,000 photos. To organize I use Lightroom. I went through and flagged every photo I thought was worthy including any photos of animals that I only had a few shots of. This becomes my main photo references. Then I organize them into Category Folders in lightroom and I did it by species since we traveled to multiple areas. Examples of categories = Lion, Elephant, Antelope, Meerkats, Aerial, Scenics, Camps, People. I put all of these categories into a giant Collection Set in lightroom titled “AFRICA 2016”. Now I can click on the main folder and see all photos organized by date and then select a category if I want to pick the best Lion or Hippo photos.
Africa had a special color to it while there so I made up 2-3 presets to apply to all of my RAW photos.
PHOTOGRAPHY MILESTONES:
In Fall of 2004 I purchased my first DSLR after a summer job helped pay for some of it. Little did I realize at the time how important that purchase was as nearly 12 years later.
During our African adventure I crossed a milestone that I did not realize until we arrived back home:
During Africa I surpassed my 100,000 photo!!! I use Adobe Lightroom to manage/edit all of my photos and it wasn’t until I got home I realized what I had achieved. Over 100,000 photos taken by various DSLR’s since 2004 have made it from my camera onto my computer.
Not bad for a weekend warrior amateur photographer!
Other Stats:
Photos/Videos taken in Africa: 7,000
Most photos taken in year: 15,000 during 2015
Photos taken in 2005: 1,800
Wearing the F-Stop Tilopa Bag at Victoria Falls. The Mefoto Tripod is visible but was tucked inside the bag for stealthy carrying (don’t want to make it super obvious you are a walking goldmine):