
Synopsis: Below are detailed instructions on how to replicate a small wood triangle for your home wall. The materials are simple and the instructions are (hopefully) very simple. This small wood volume will add a lot to your wall for a minimal amount of money.
Approximate Time of Build: 1-3 hours
Materials Needed:
- 3/4″ thick 7 or 9 ply wood ~4ft x 4ft (available in full 4×8′ sheets at any hardware store, most will cut down to size and at Home Depot they have precut 4’x4′ pieces for you). Get the good stuff too (usually labeled ACX or one stop down would be CDX) since these are small and you may want to paint it.
- 1.75″ screws (approx): At least 10 screws. These will be for attaching the pieces together.
- 2.5″ screws (approx): At least 8 screws. These will be for mounting the volume to your wall
- T-nuts about 30 or so depending on size
- Total Material Cost will be $20-30
Tools Needed:
- Circular or Table or Jig Saw: Anything to cut straight lines
- Screwdriver/Drill (hopefully electric)
- Tape Measure
- Long straight-edge for making cut lines (can be a cardboard box)
- 7/16th drill bit (to be used for T-Nuts)
- 1/16th drill bit (to be used for pilot holes for the wood screws)
- Sandpaper/Sander
Exact Dimension Sizes:
- Side #1 (30/60/90 Triangle):
- Length A: 14″
- Length B: 24″
- Length C: 28″
- Angle A/B: 90 degrees
- Angle B/C: 30 degrees
- Angle A/C: 60 degrees
- Side #2:
- Length A: 13.25″ (read Step #2 below before cutting)
- Length B: 23″
- Length C: 26.5″
- Top Side #3:
- Length A: 14″
- Length B: 14″
- Length C: 20″
- Angle A/B: 90 degrees
- Angle B/C: 45 degrees
- Angle A/C: 45 degrees
- Website for calculating Triangles: http://www.visualtrig.com/
Video Instructions:
Detailed Instructions:
[tab: Step 1]
- Measure out and mark on the wood Side #1
- You want the corner to be 90 degrees. The easiest way to do this is start in the corner of a new piece of the panel of wood and measure up for the short side (Length A) and measure across for the long side (Length B).
- Once you have the X and Y lengths marked connect the dots with your straight-edge. This length should be the only item that gets cut.
- Cut along Length C (should be just one long cut) and you will have a right-angled triangle

Measuring the First Side – Start in the corners

Length C Measured and Ready to Cut

Belt Sander (opt), Sander (req), Circular Saw (req), Jigsaw (opt), Drill (req), 90 degree meaure (opt), Tape Measure (req)
[tab: Step 2]
- Measure out and mark wood on Side #2
- Use same method as above and measure out the sides (ie start on one of the other corners)
- Length A will be 3/4″ shorter on Side 2 (as this is how the triangle will overlap to fit together)
- Additionally it will be 1″ shorter on Length B
- This is because Side #2 fits inside of Side #1 and the angles need to be the same
- Cut Side 2(the diagonal cut)
- At this point you should be able to loosely put the pieces together and it should somewhat resemble a triangle
- Test for fit

The Two Sides Cut out (Note on Side B, it should say 23″ not 24″). My wood sat out in the rain and was a little dirty.

Testing for Fit. In this Photo I had the length too long and had to chop it down.
[tab: Step 3]
- Assemble Side 1 and Side 2 by joining them on the common length side (Length C), Side # 1 is larger and will sit on top of Side #2
- Using ~1.75″ screws secure the two sides together
- Drill a pilot hole at the top put in a screw, put another pilot hole at the bottom and another screw, then add in the other screws as needed
- ALWAYS use the pilot holes for the screws as you can easily destroy the volume otherwise (because you are screwing into the thin 3/4″ side and can split the plywood very easily)
- At this point you should have something that resembles a triangle (without the top of course)

Prescrewing the holes on Side A so that it is easy to attach

Side A (facing us) with 7 1.75″ Screws attached to Side B
[tab: Step 4]
- Measure for Side 3 by using the actual top dimensions of your partially assembled volume.
- Mark the wood and make the cut (measure twice, cut once!)
- The easiest way to measure is to place the assembled triangle on top of the plywood and trace out the cut. (if you start in the finished corner it makes it even easier)
- Attached side 3 to the to the top of Side 1 and 2 using screws
- Use pilot holes
- At this time you should have an almost completed project

Top of the Volume Attached with 1.75″ Screws

Inside of the Climbing Volume – No Reinforcements Needed
[tab: Step 5]
Optional Step: You may have noticed that the volume does not sit flush against a flat surface because of the angles of the wood. You can make it flush by taking a jig-saw and trimming it down after you have built it. Additionally if you are very proficient in Circular/Table saw use you can do this prior to assembling the sides together by knocking them off at a 45 degree angle
- Not having them flush is not a structural issue, but is only for cosmetics
- After cutting this flush on one volume and not doing this on another volume, I recommend not cutting down the edge if you don’t need to.
[tab: Step 6]
- Mark holes where you want T-Nuts
- You can also randomly drill holes, but I find it helpful to know where I am drilling before I start
- Put enough t-nut holes that you have plenty of options
- You do not need to follow a specific pattern, however some people like that
- keep them at least 2 inches from the bottom edge, otherwise they will be unusable with holds
- Drill the holes using the 5/8th’s” bit
- Drill them straight
- If Painting wait until you paint before putting in T-Nuts, if not painting pound in the T-Nuts
[tab: #7: Painting]
- Sand all the edges (remember you will be slapping this with your hands) to make it really smooth to touch
- Finish with paint, stain or sealer as needed
- Painting Tips:
- After sanding Primer is the best thing to put down first on the wood. It acts as a sealer and allows the paint to really stick. Primer is not needed, but helps prevent chipping, etc.
- Latex Paint = This is the stuff you find in cans at Home Depot/Lowes and you apply with a paint-brush. Works great, cheap, not messy to apply, however make sure the T-Nuts are not installed before painting with Latex. Latex will cover the holes and it is best to paint the volume, then drill the holes for t-nuts.
- Spray Paint = easy solution just requires a well ventilated space that is well protected. Apply numerous thin coats (3-5+).
- Utherne finish = comes in both spray cans or can be applied via a brush. If you do a cool paint job it helps to seal it with utherne. Found in the paint aisles at any home improvement store. Necessary to keep holds from sticking to your paint job.
- Using Tape to make Designs = On my Optimus climbing volume we used lots of coats of paint and also used the blue painters tape to get all of the designs.

The Triangle Volume with Blue/Purple Paint and Holds Mounted on it
[tab: #8: Mounting]
- Once everything else is done (paint/t-nuts/etc) it is time to mount the volume.
- Use 2.5″ long wood screws (need to be long), you will need at least 8
- Predrill the screws into each corner(3-4), where the screws are partially into the volume but not sticking out the otherside. This makes it easy to mount the volume by yourself if no one else is there to help hold it.
- Find a spot that looks suitable on your wall (I do not like to put volumes in the middle of the wall but instead put them usually offset off of the middle. Makes route-setting more interesting). Screw in the predrilled screws.
- Make sure there are at least 3 wood screws per side.
- Mount a climbing hold or two to test strength.
- Grab a 6 pack, some friends, and enjoy your awesome new creation.

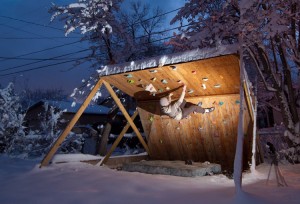
Here I mounted the Volume on the Roof and took it for a Test Drive

The Triangle Volume Mounted to the Wall with Holds and Optimus in the Background
[tab: All Steps]
Steps:
- Acquire Materials
- Measure out and mark on the wood Side 1 per the above dimensions
- You want the corner to be 90 degrees.
- Once you have the X and Y lengths marked connect the dots with your straight-edge. This length should be the only item that gets cut.
- Cut out Side 1
- Measure out and mark wood on side 2
- Use same method as above, but the size will be slightly different
- Cut Side 2
- At this point you should be able to loosely put the pieces together and it should somewhat resemble a triangle
- Assemble Side 1 and Side 2 by joining them on the common length side
- Using ~2″ screws secure the two sides together
- At this point you should have something that resembles a triangle (without the top of course)
- Measure for Side 3 by using the actual top dimensions of your partially assembled volume.
- Mark the wood and make the cut (measure twice, cut once!)
- Attached side 3 to the to the top of Side 1 and 2 using screws
- At this time you should have a mostly finished product
- Mark holes for T-Nuts
-
- Put enough t-nut holes that you have plenty of options
- keep them at least 2 inches from the bottom edge, otherwise they will be unusable with holds
- Drill and Pound in T-Nuts
- Optional Step: You may have noticed that the volume does not sit flush against a flat surface because of the angles of the wood. You can make it flush by taking a jig-saw and trimming it down after you have built it. Additionally if you are very proficient in Circular/Table saw use you can do this prior to assembling the sides together by knocking them off at a 45 degree angle
- Not having them flush is not a structural issue, but is only for cosmetics
- Sand all the edges (remember you will be slapping this with your hands) to make it really smooth to touch
- Finish with paint, stain or sealer as needed (if you paint putting a couple coats of polyurethane will make the paint last longer)
- Mount to your home wall using a couple screws in the edges
[tab:END]
Notes:
- Larger volumes may need additional reinforcement inside of them
6 comments
2 pings
Skip to comment form
Do have any ways to get measurements for different size volumes? I have made three of these already and can’t figure out how to make a bigger one or different shapes.
Thanks!
Author
Har Simran – I don’t have any measurements in front of me, however I have found some good success in starting with a large triangle and cutting angles until it fits. Granted this means you may screw-up so maybe trying it out on scrap wood is a good way to start.
Also here is another awesome volume I created with one huge triangle and two smaller triangles that I cut independently to fit without really measuring anything beforehand: http://www.mountainproject.com/v/107523398
I will try to get some dimensions posted. The biggest thing is that the inside angles usually need to be cut at a 45 degrees or higher to allow for it to fit together; this can be a pain.
Also here is some inspiration from other companies: http://www.motavationvolumes.com/volumes
Looks great Andy! Thanks for labeling us as the “inspiration” company. That made my day!
When drilling your t-nut holes, this tool will help get them perfect without a drill press.
Wolfcraft Wolfcraft 4525404 Drill Guide Attachment for 1/4-Inch or 3/8-Inch Drills.
Cheers,
Jared Stains
Owner of Motavation Volumes
Har Simran you could also use cardboard if your not that great at triganomitry.
Have you ever tried to use a power sander to create a flush contact with the wall rather than a jigsaw? I’m finding it extremely ackward (and a bit unsafe). I don’t own a sander, but I was thinking I may buy one. I’m not sure if it’d even be feasible to remove that much of the plywood via sanding…
Great site by the way. Gave me some great ideas for my wall and the volume I made this weekend looks great!
Author
Yes, I have a power sander now and it does a pretty good job. The jig-saw thing doesn’t work too well. Other’s have suggested to me that during the cutting phase of the plywood pieces that you can set the angle of the circular saw to 45 which pretty much solves the problem as long as you put extra thought into making sure you are cutting from the right angle. Honestly though I have built 2-3 more volumes since that one and I just leave the edge pieces as they are since they don’t really stick-out too far.
[…] volume has added by far the most variety. While you can purchase some awesome volumes, you can also build your own to fit your wall. We’ve also maximized our wall’s natural location with in our attic […]
[…] Librande, Andy. “Build a Triangle Wood Volume for Your Climbing Wall.” The Home Climbing Wall Resource Tips, Tricks, and Inspiration for Home Woodies. 11 Mar. 2012. http://andylibrande.com/homeclimbingwall/2012/03/build-a-triangle-wood-volume-for-your-climbing-wall… […]